CT2Mesh2Print
CT2Mesh2Print is the story of how I turned a CT scan into a physical anatomical model. I reconstructed the scan in a DICOM viewer, isolated the bone structures, cleaned up the exported mesh, and had the result 3D printed: first as a cheap plastic prototype, then as a high-resolution resin skull I can hold, inspect, and study. I have the patient's full permission to create this print and to publish this article.
Why I did this
My father is a doctor, so medicine and anatomy were always close by. Even though my own background is in IT, I keep finding ways to step into healthcare, including a pharmacy internship in 2023. This project came from that overlap: I wanted to see how far I could take medical imaging data once it left the radiology workstation.
Getting usable data
Everything starts with the CT scan, and the print can never contain more detail than the scan. A standard diagnostic scan may be perfectly useful for a doctor but still too blocky for printing, especially around thin bones and small openings. The scan I worked with had the properties that matter for a printable model:
- Slice thickness: under 1 mm, for smooth vertical detail
- Slice increment: no larger than the slice thickness, so no detail was skipped between slices
- Pixel size: under 0.5 mm, for sharp XY resolution
- Reconstruction algorithm: a "Bone" kernel, which produces cleaner bone edges
- Gantry tilt: 0°, so the geometry came out undistorted
- File format: uncompressed DICOM, with no compression artifacts
From DICOM to mesh
With the scan exported as DICOM files, I loaded it into RadiAnt DICOM Viewer, which handled all the reconstruction work I needed without much setup.
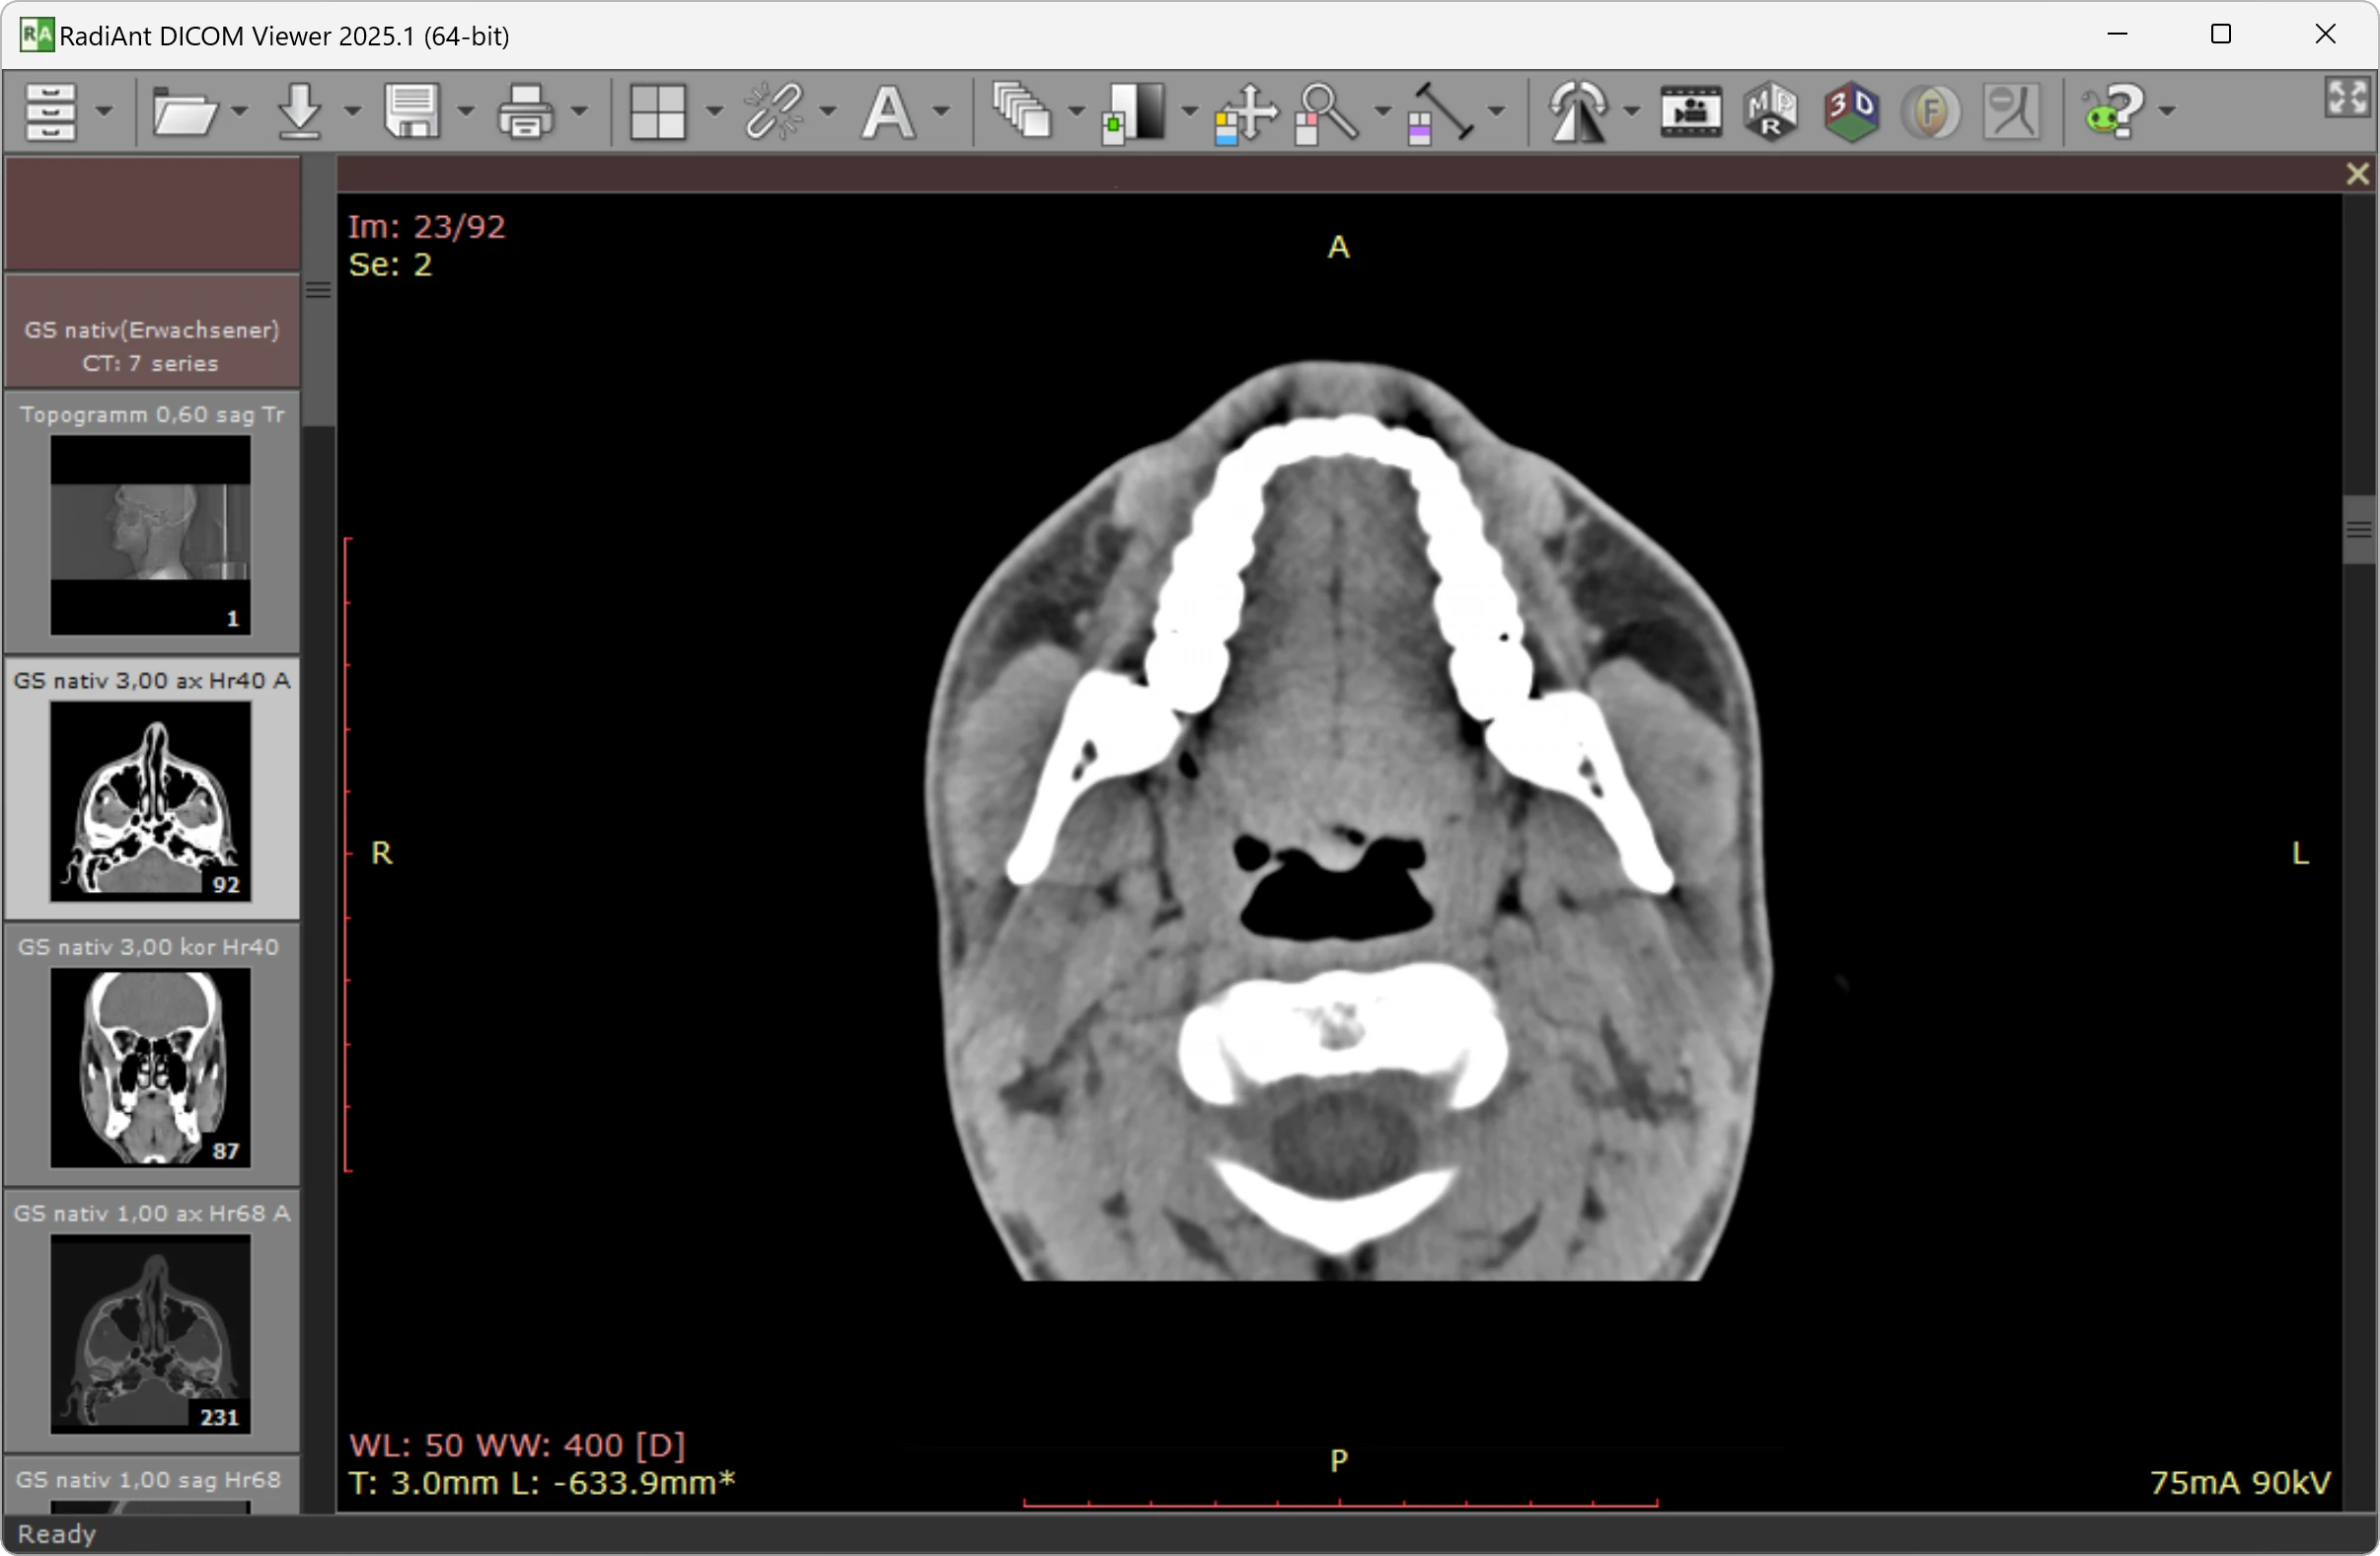
Multiplanar reconstruction
My first step was a 3D Multiplanar Reconstruction (MPR). The software stacks the 2D CT slices into a volume that I could inspect from every angle before exporting anything.
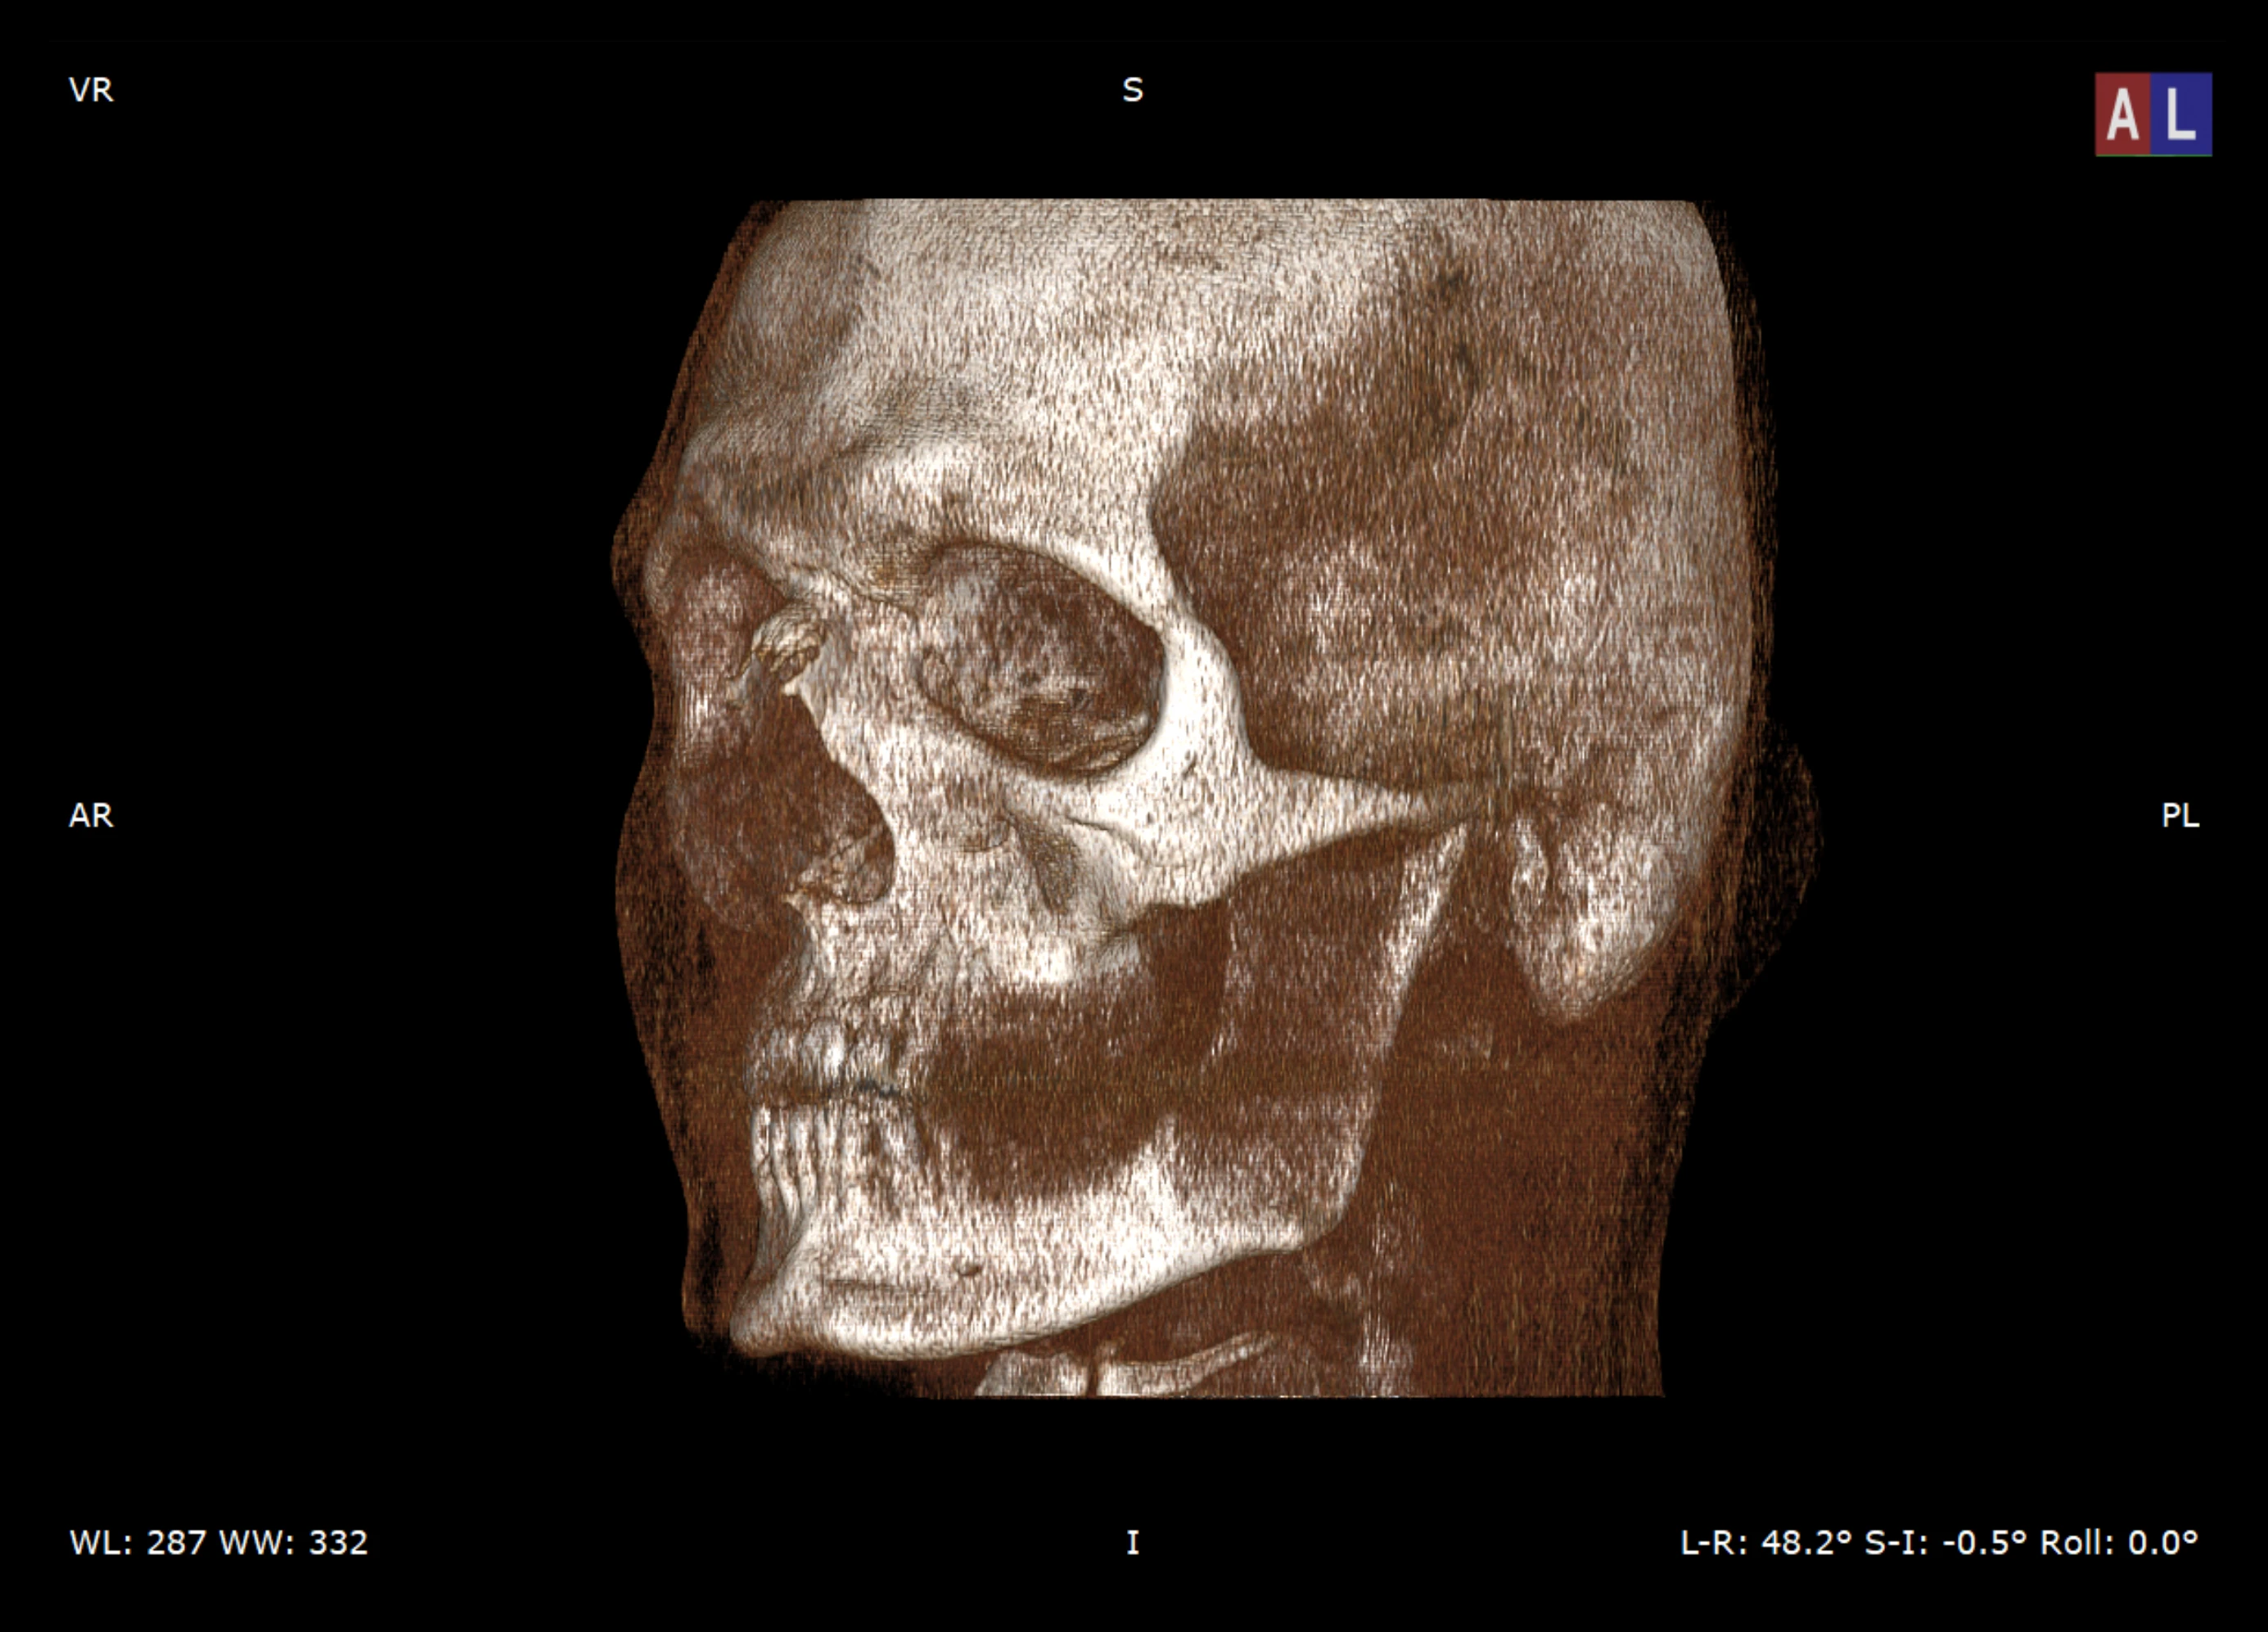
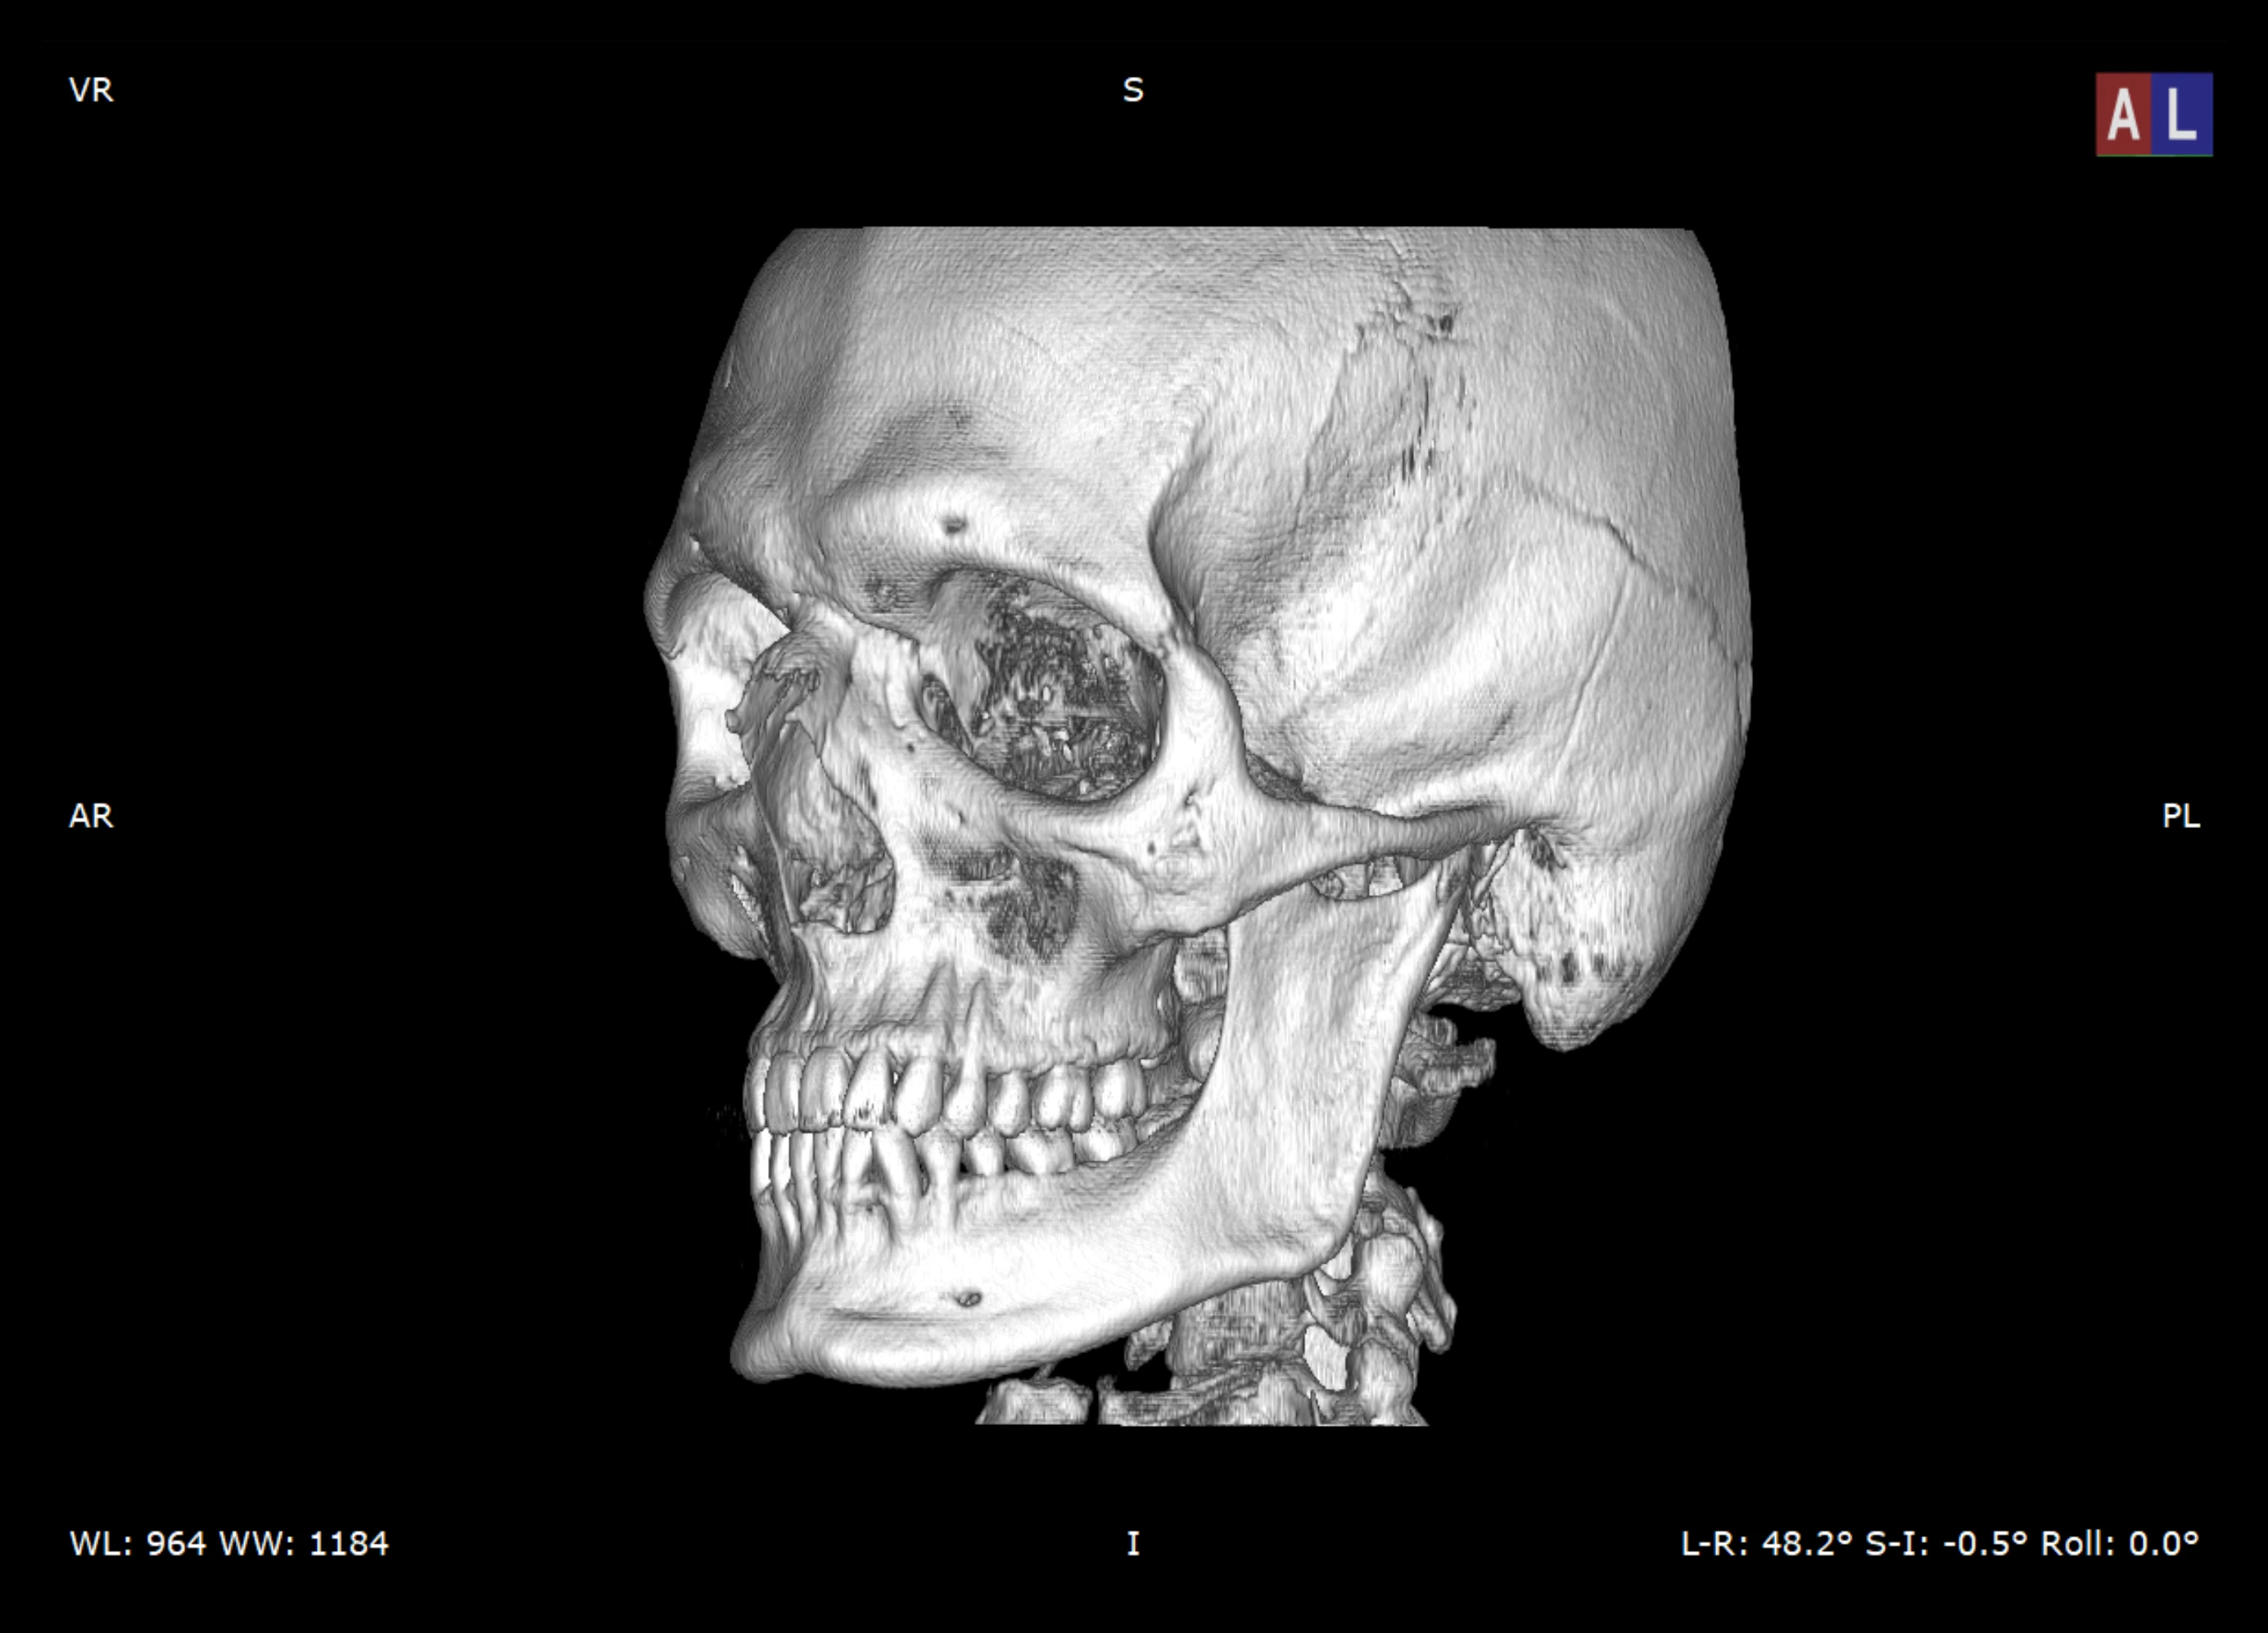
Segmentation
Segmentation is where the model started to become printable. I chose RadiAnt's bone-focused rendering preset ("Bones B/W") and adjusted the threshold until the skull and cervical vertebrae separated cleanly from soft tissue and scanner noise.
The threshold took some patience. Set too low, the mesh fills up with artifacts; set too high, thin bone structures disappear. I kept adjusting until the important anatomy was visible without carrying too much junk into the export.
Cleaning the mesh
I exported the segmented model as an STL file, the common format in 3D printing that describes a model as a surface made from triangles. Medical exports are rarely ready to print, and mine was no exception: it was full of disconnected mesh islands, internal noise, holes, and non-manifold geometry.
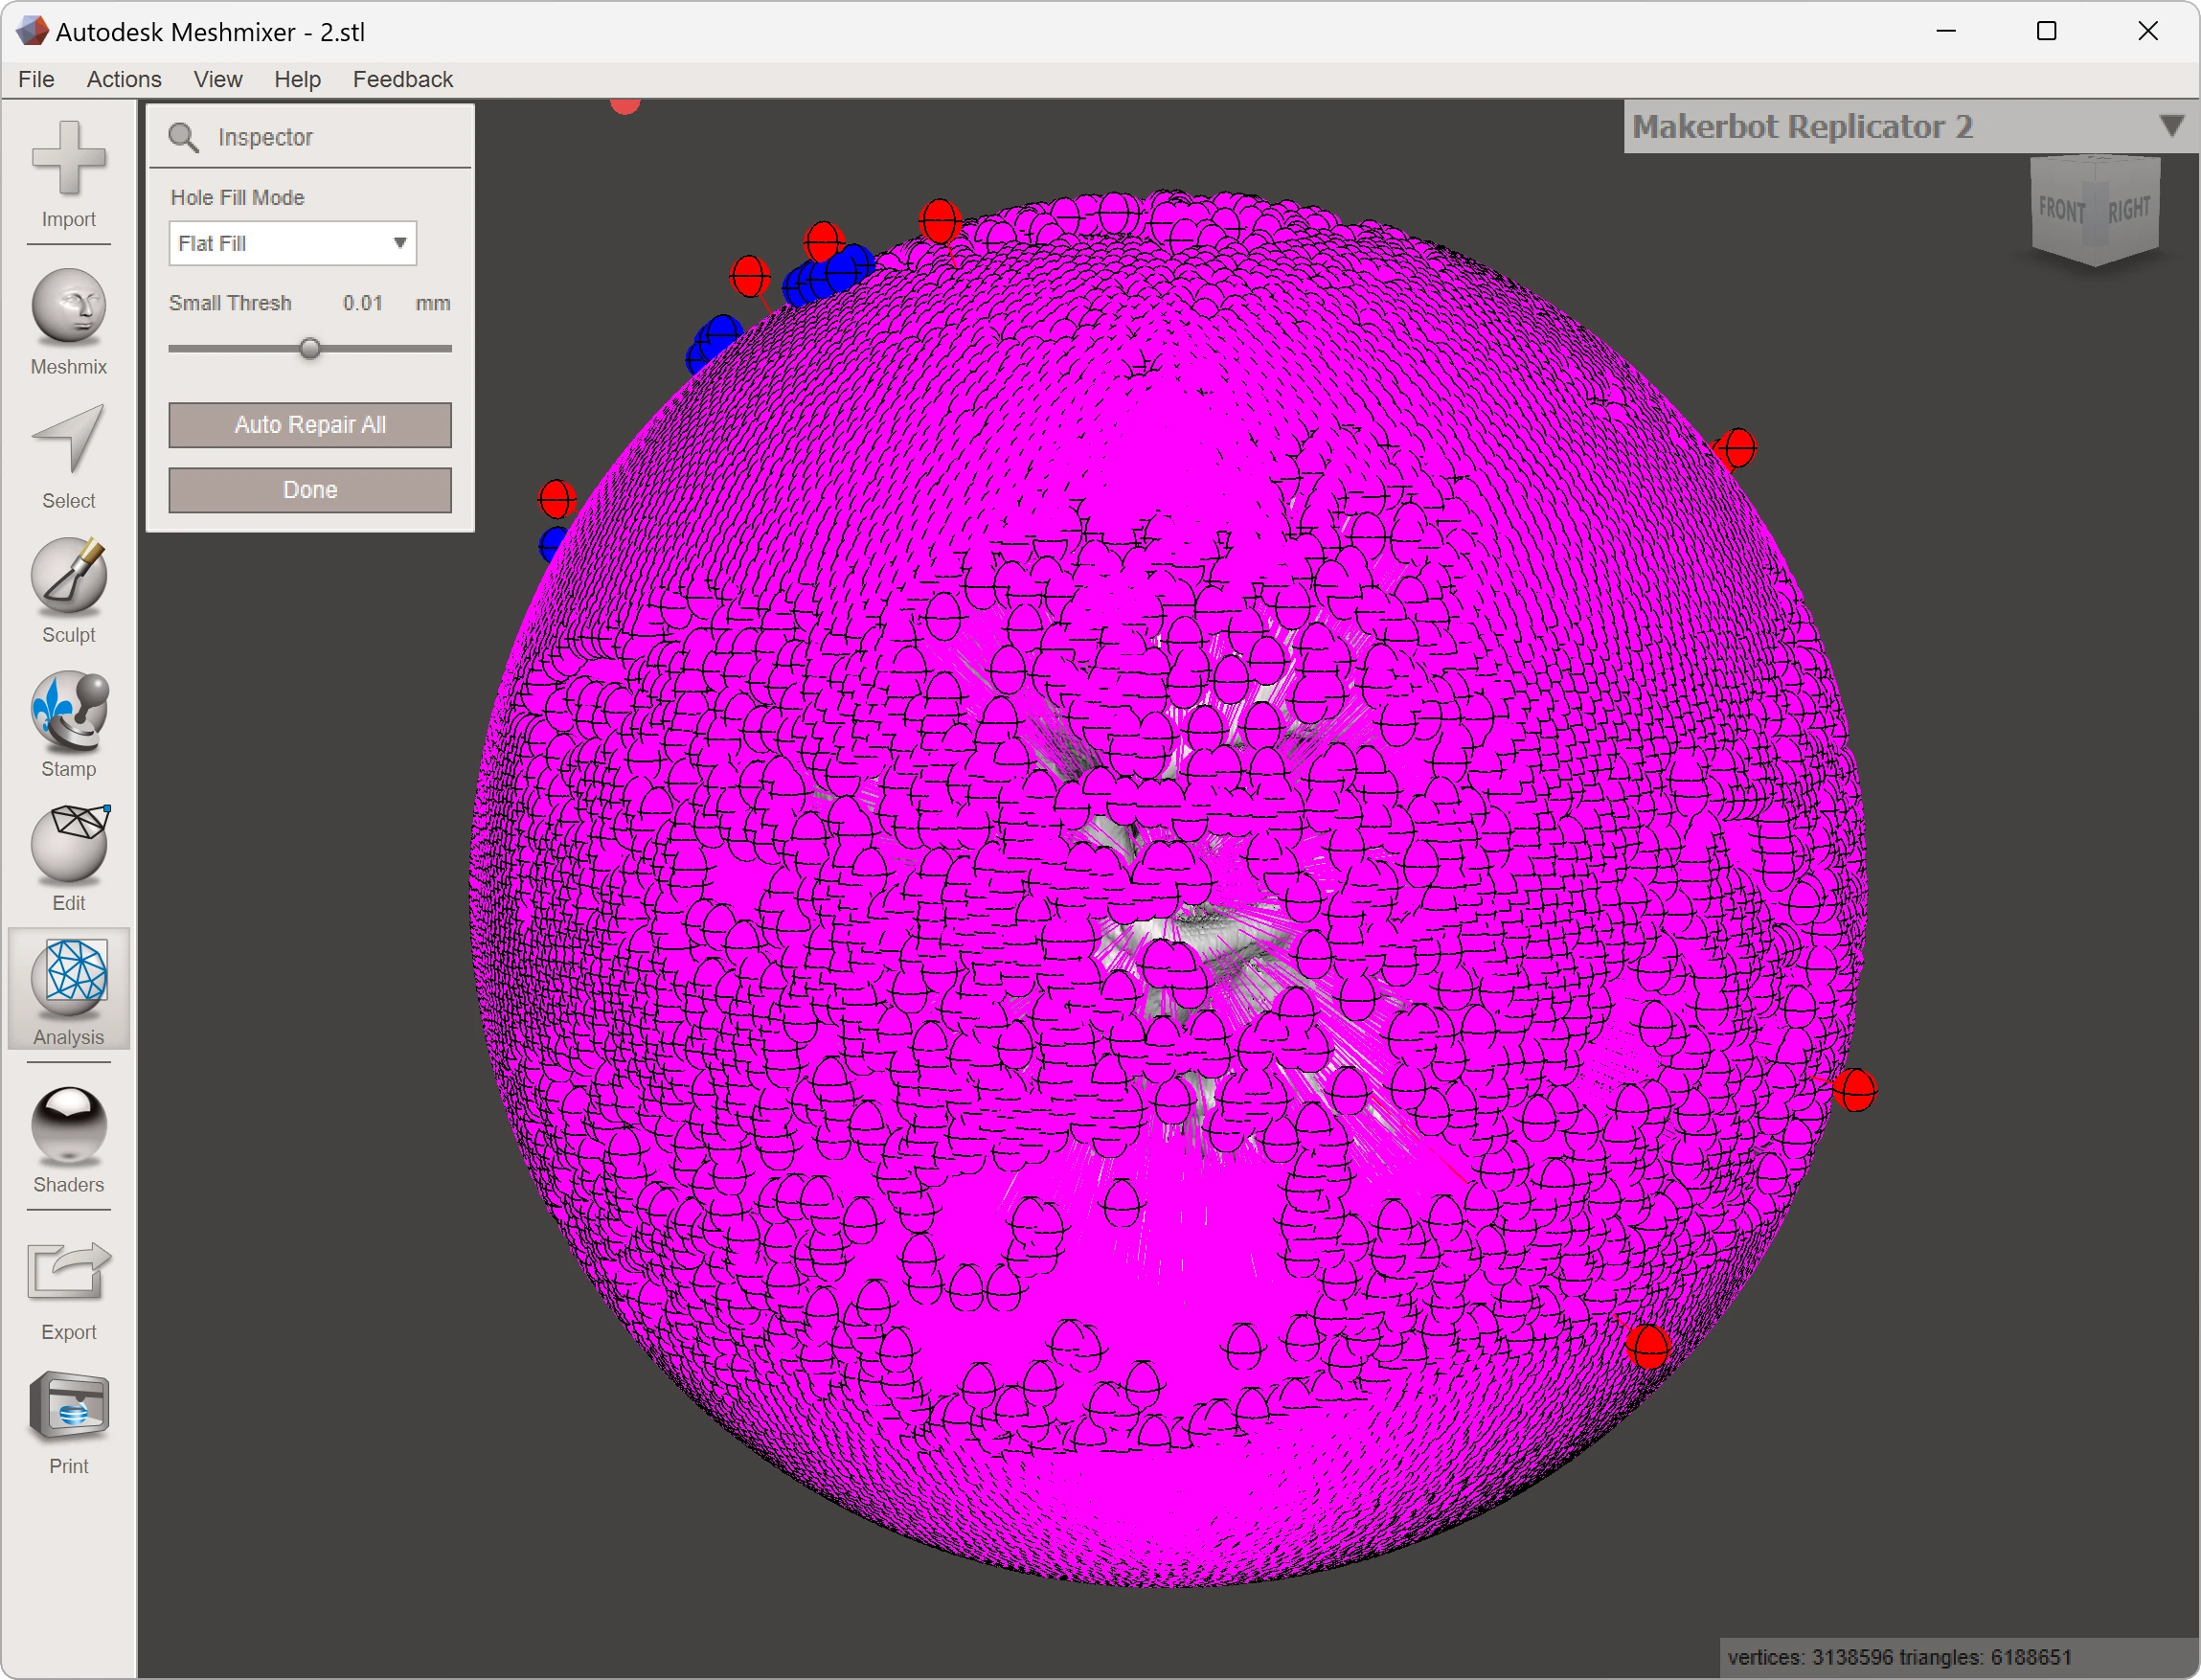
Model cleaning
Using Meshmixer and 3D Builder, I worked through the defects one category at a time:
- Smoothing: I smoothed the jagged, noisy surface of the first mesh without losing too much anatomical shape.
- Island removal: I deleted the small disconnected fragments that segmentation left behind.
- Solidification: I closed every hole and open edge to make the model watertight, and filled the brain cavity so the skull could print as one solid object.
- Wall thickness: I checked that the model kept at least 1 mm of wall thickness throughout, since thin walls break easily in resin.
- Hollowing: I hollowed the model to reduce material use and print time, and added drainage holes so uncured resin could leave the model during post processing.
Prototyping
Before paying for a resin print, I wanted proof that the model worked physically. I ordered an FDM prototype in PETG through Craftcloud, printed by a company in Lithuania, for about €40 including shipping. FDM printing uses thermoplastic filament, so it is much cheaper than resin and a low-risk way to check the scale, balance, and handling of the model.
The FDM print does not have the fine detail or bone-like surface finish of resin, but it did not need to. I only needed proof that the model worked physically. Once the dimensions and stability looked right, I moved on to the final version.
A second scan and a better model
While preparing the final version, I went back to the source data and found a second CT scan of the same patient. I digitally combined both datasets into a single, more complete skull. That merged model, not the one behind the prototype, is what went into production, which is why the final print looks slightly different from the earlier digital models.
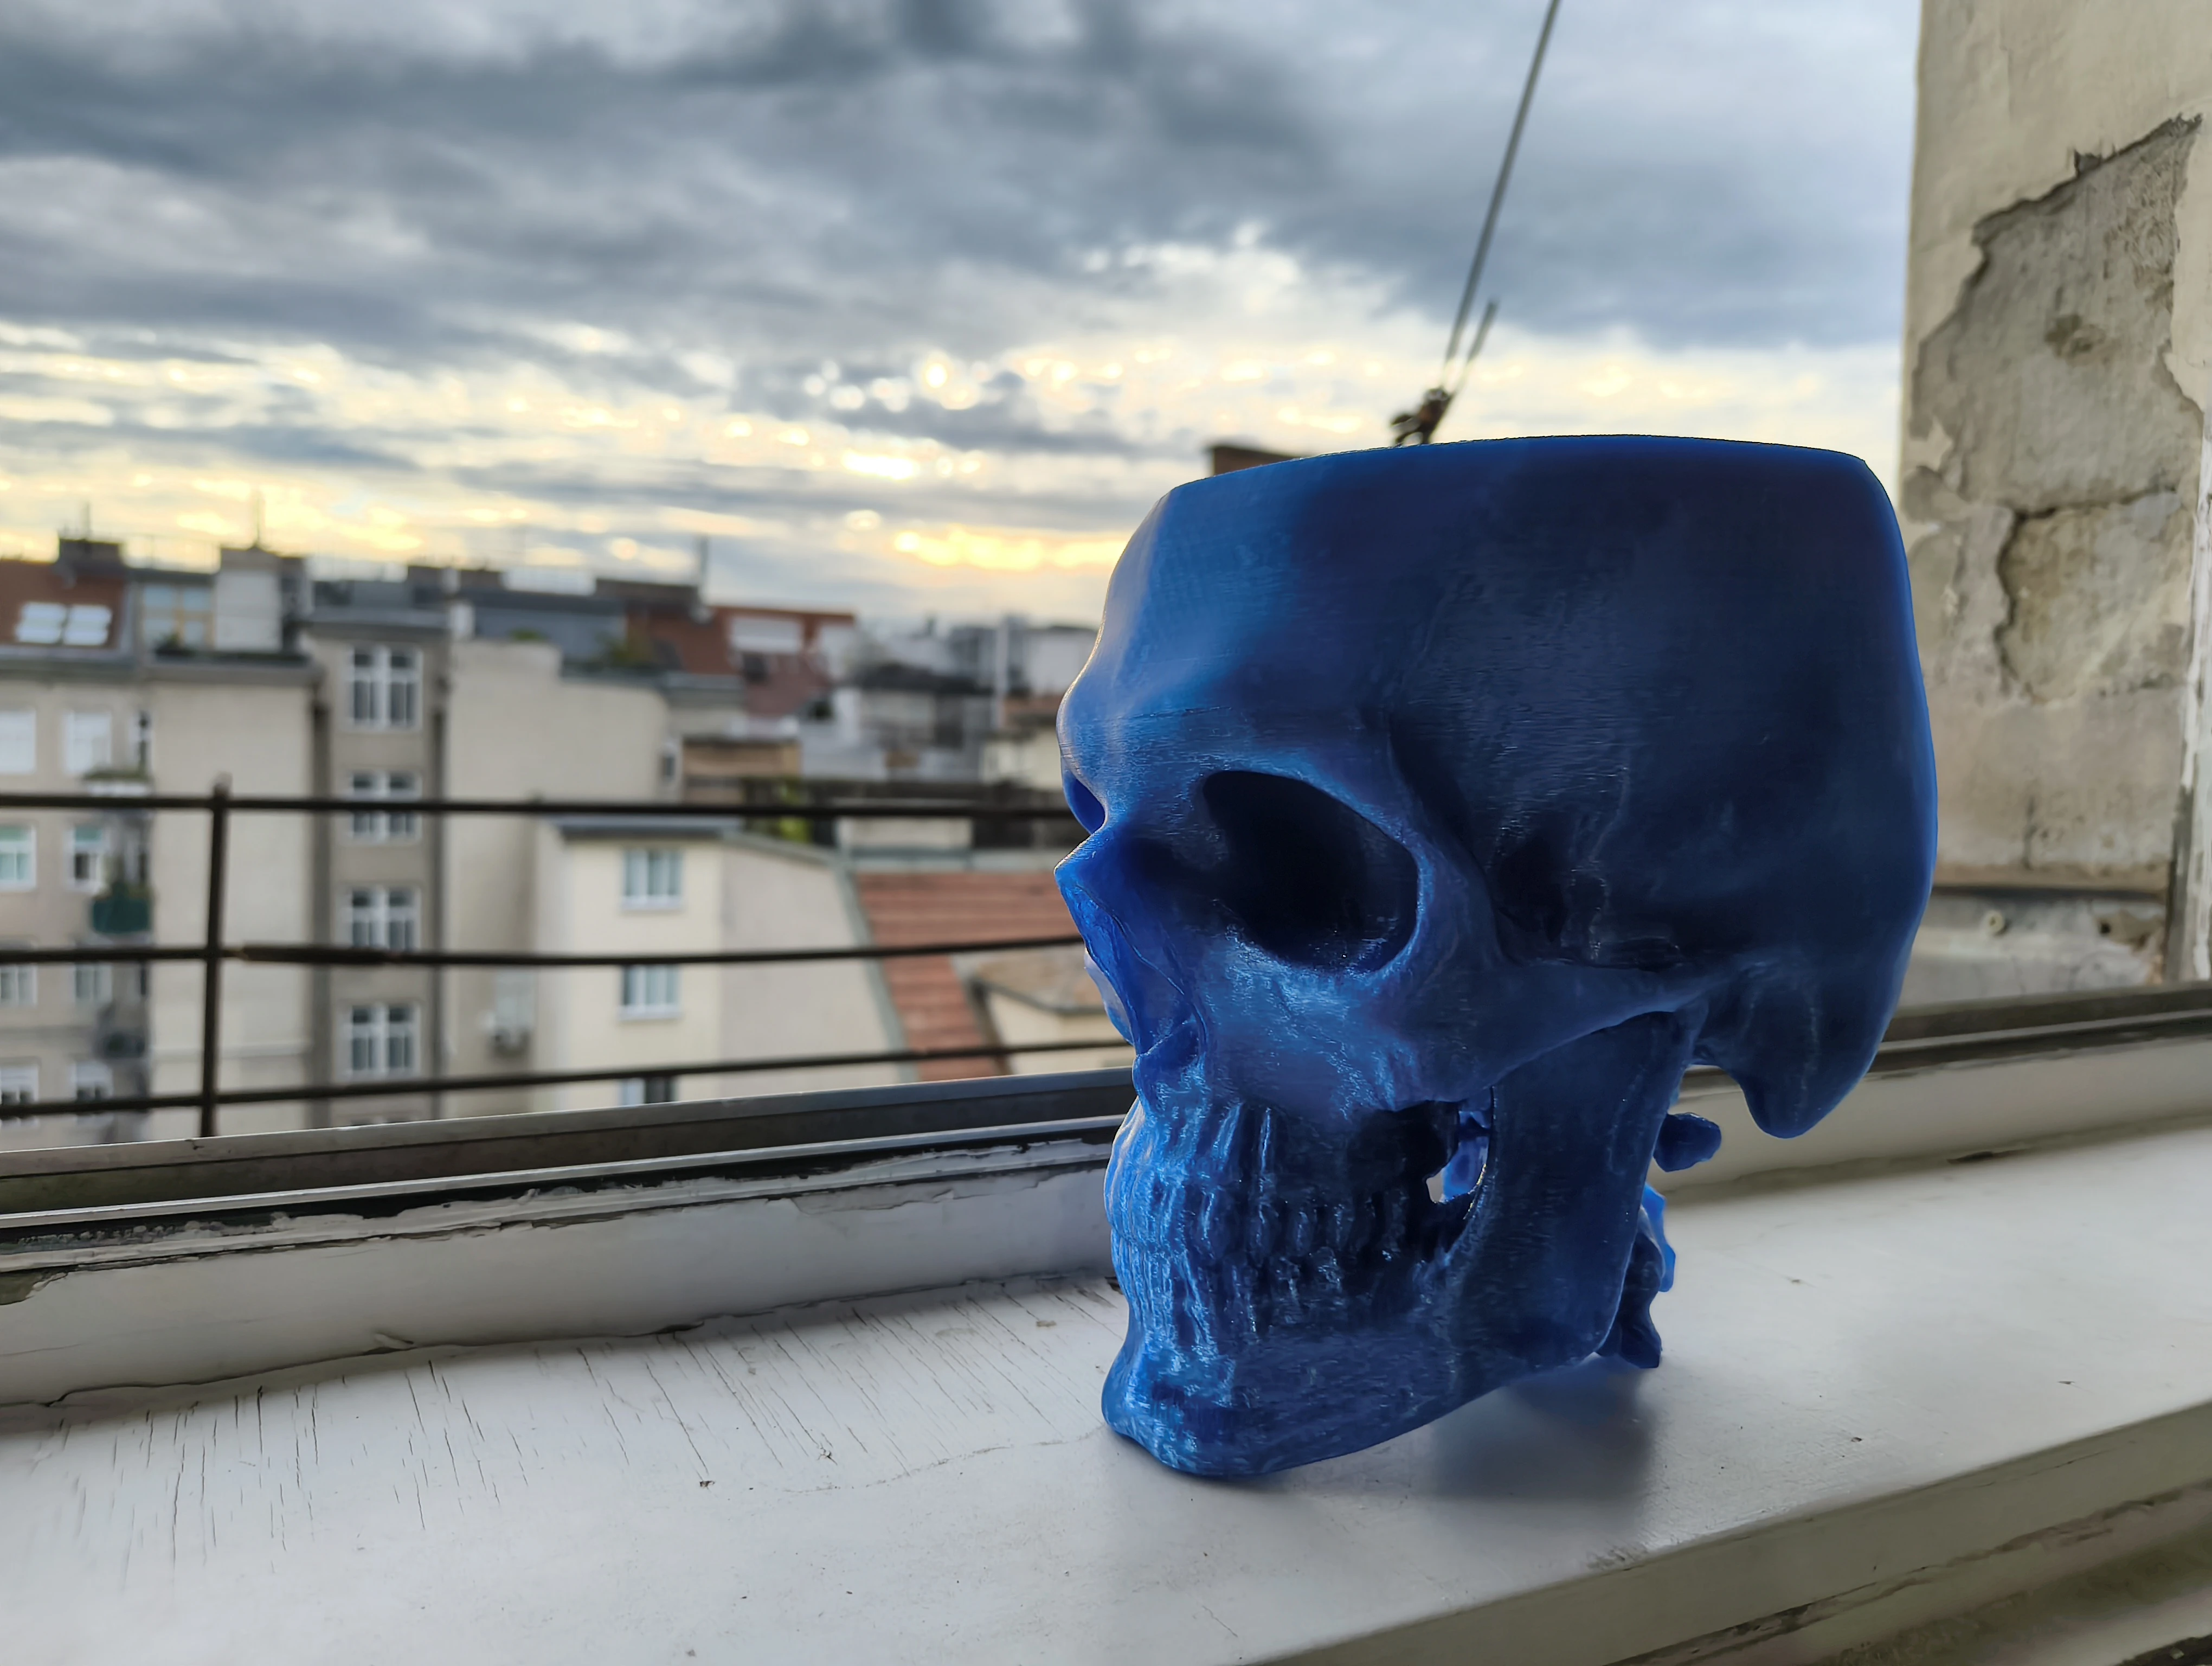
The final print
For anatomical detail, resin printers (SLA or DLP) beat FDM: they capture small features and produce much smoother surfaces. The catch is build volume, because a full-sized skull does not fit on most consumer resin printers. I could have split the model into parts or scaled it down, but I wanted it in one piece, so I ordered it from JLC3DP in China. Their industrial SLA machines printed the merged skull as a single part for about €80 in total, with better surface quality than I could have gotten from any setup available to me.
One step I never had to touch: support structures. Overhangs such as the teeth, jaw, and chin need temporary supports underneath them during a resin print, otherwise they can deform or fail. I sent in the model without any supports; the factory generated them for the print and removed them again before shipping.
Post-print washing
A resin print comes off the printer covered in uncured resin. That residue has to be removed before final curing, otherwise the surface stays sticky and the part can cure unevenly. This step happened at the factory: the model is washed in isopropyl alcohol or a resin cleaner until no residue remains. Uncured resin is an irritant, so I was happy to leave this part to people with proper equipment.
UV post-curing
After washing and drying, the print needs UV post curing. The printer hardens the resin only enough to form the object; extra UV exposure completes the chemical reaction, makes the resin stronger, removes the last surface tackiness, and helps the model resist warping. This, too, was handled by JLC3DP: the skull arrived fully cured, with the supports already removed.
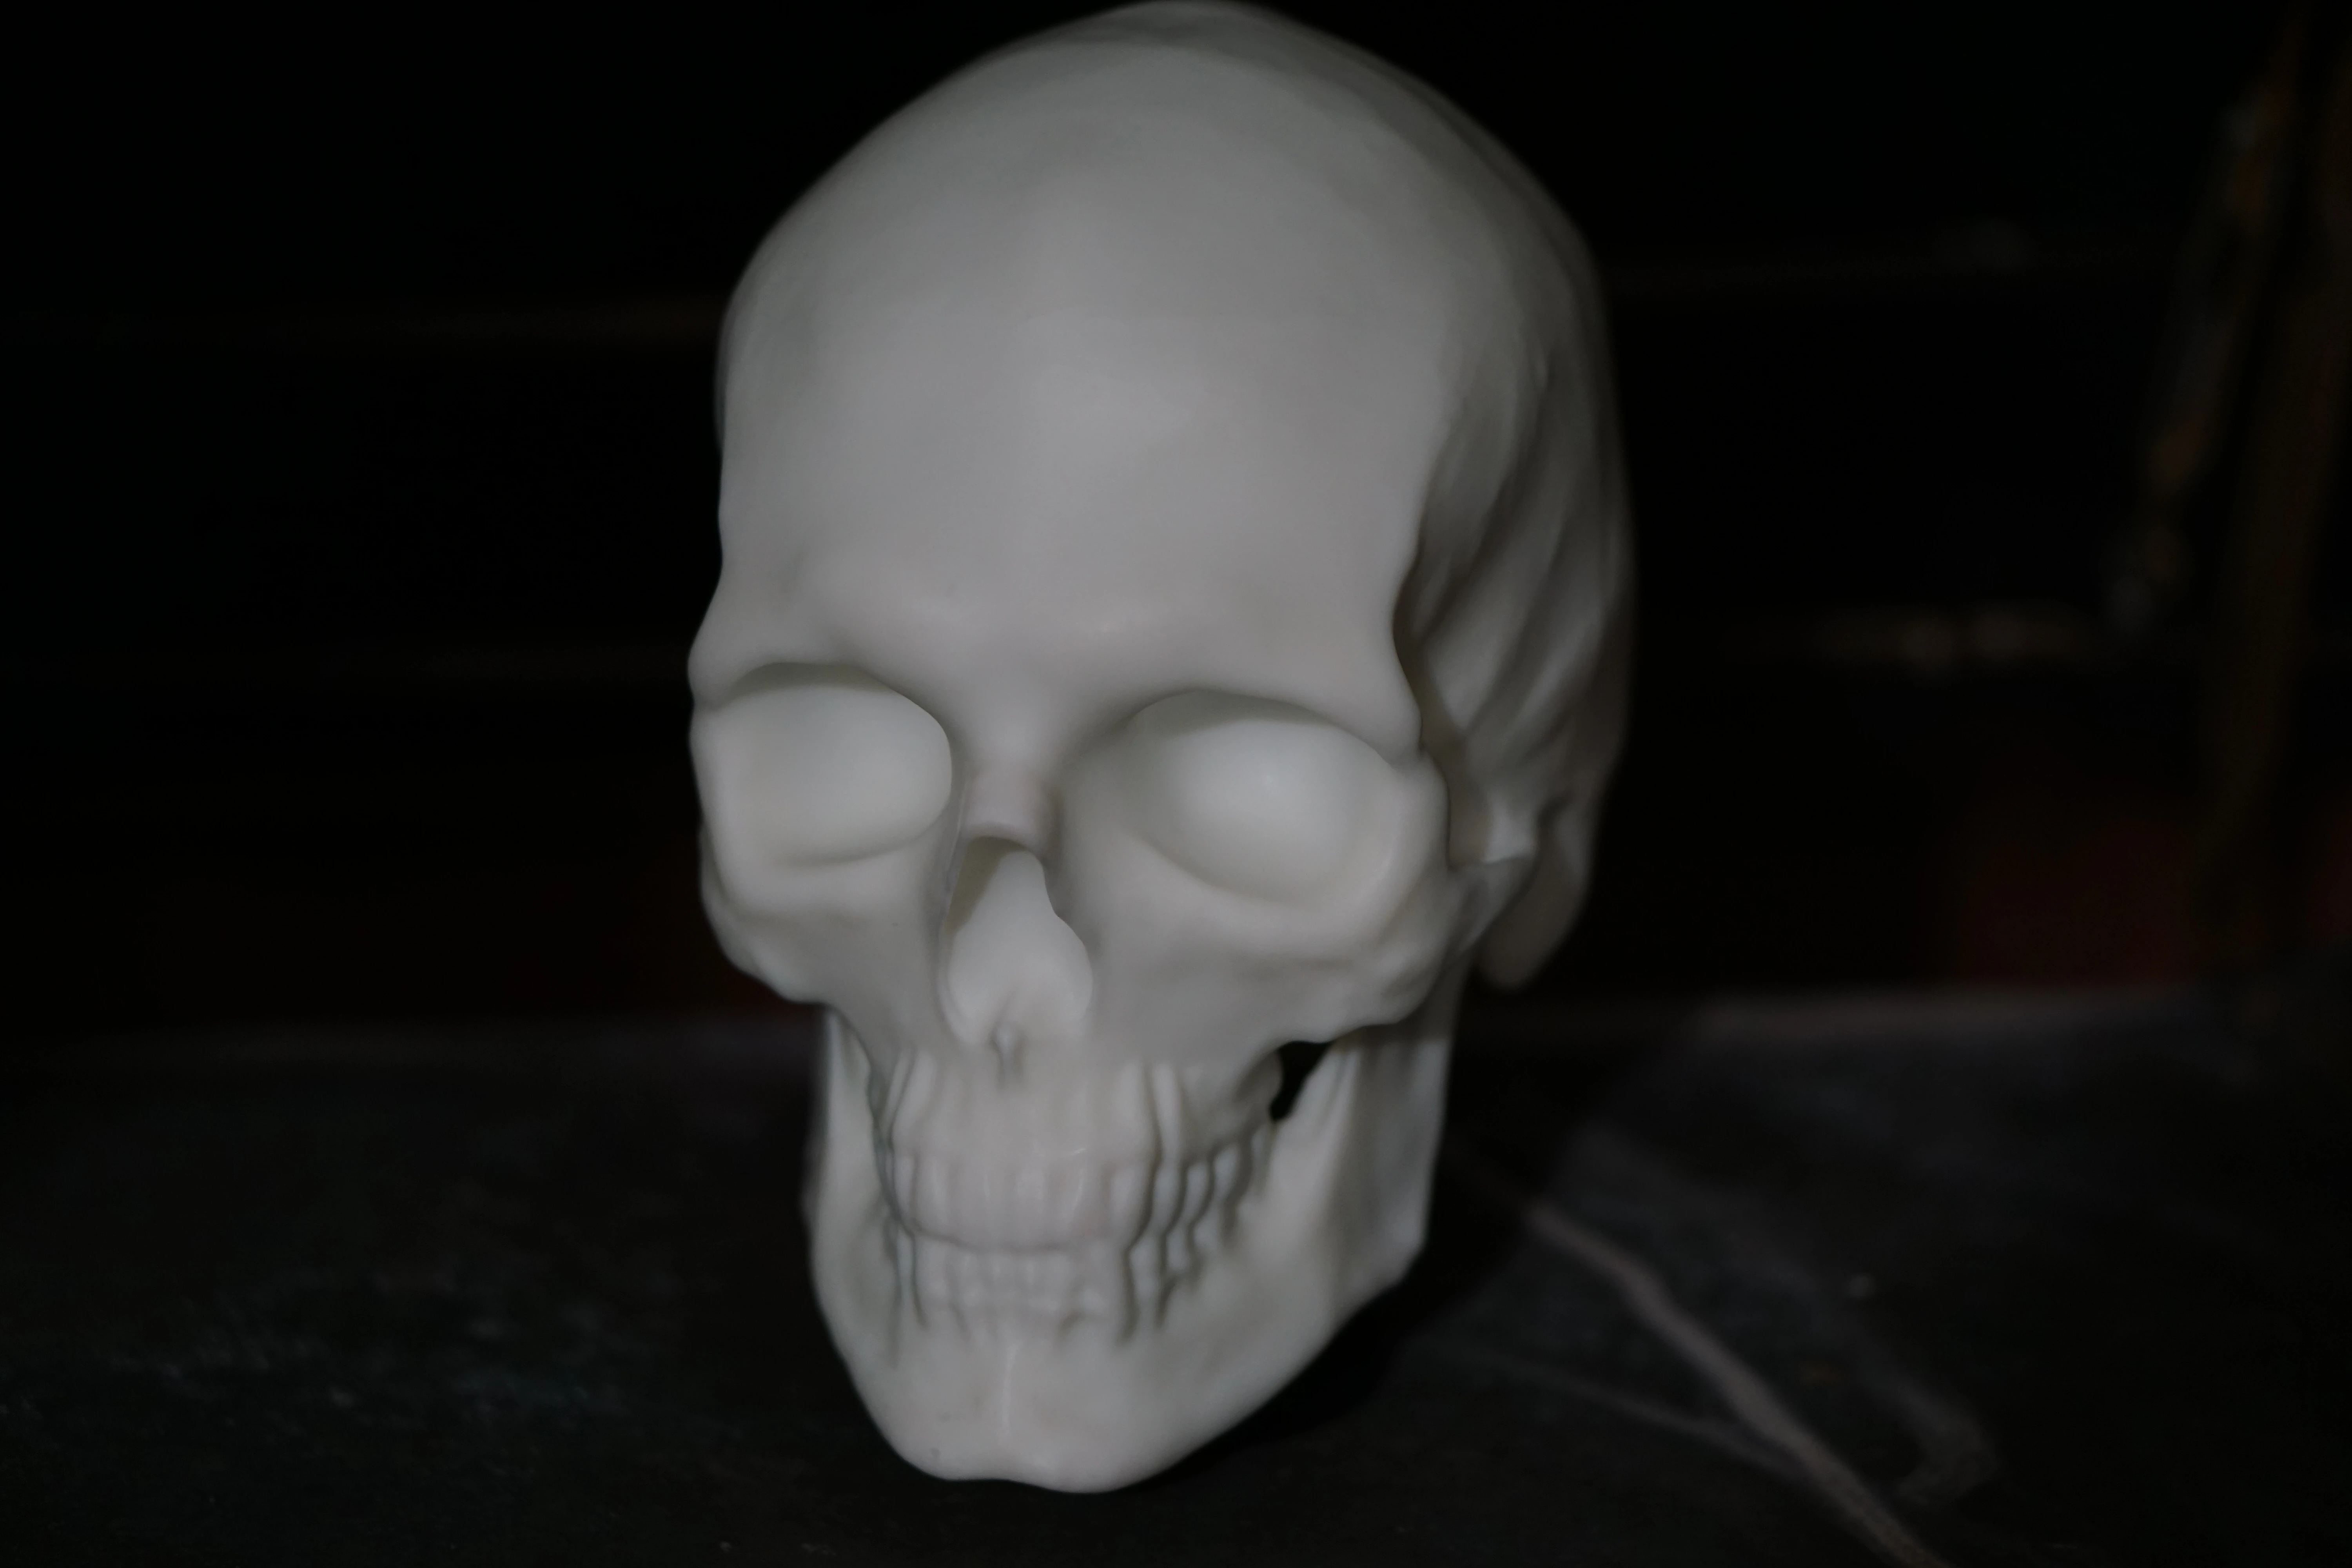
Result
What arrived was a finished, detailed anatomical model, ready to pick up. The scan data had turned into something much more useful to me than a file on a screen: a physical model I can pick up, rotate, and study from any angle.
Looking back, two things carried the project. The quality of the input scan set the ceiling for everything downstream, and the cheap PETG prototype turned ordering the expensive resin print from a gamble into a decision.